
The short version
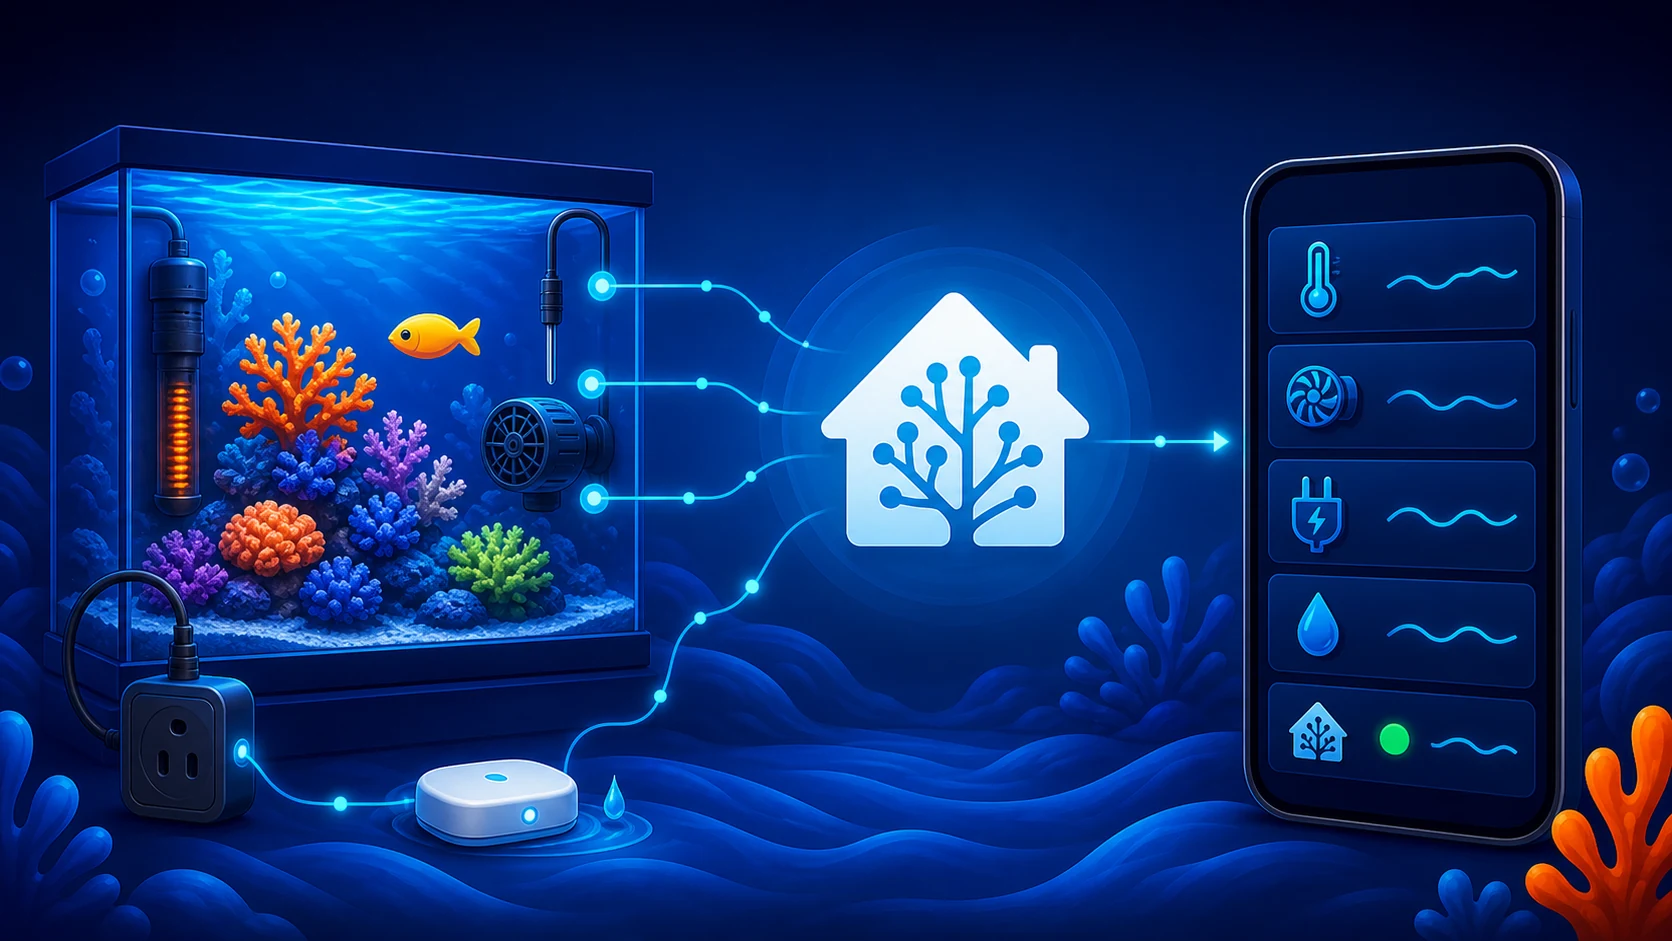
The Reef Trak bridge is an integration that runs inside your Home Assistant. You choose the devices that belong to one tank, and the bridge sends their readings to that tank in Reef Trak. Smart plugs, heaters, temperature probes, leak sensors, lights, pumps, and fans can appear in the Reef Trak app while you are at home or away.
Live changes normally arrive in about two seconds. Numeric readings build an hourly history for seven days, so a temperature or power card becomes a trend instead of a moment. The integration download is free. Pairing it to a tank is a Reef Trak Premium feature because the live relay, history, and remote app view use ongoing cloud infrastructure.
Node One adds local on/off control for compatible Home Assistant switch entities, including supported smart plugs and pumps. It confirms the reported state, uses power feedback where available, and never retries a command automatically.
What Home Assistant is, and who this is for
Home Assistant is an open-source home automation platform that runs on hardware you control. It brings equipment from many brands into one local system. In a reef room, that might mean a Kasa power-monitoring plug under a heater, an Inkbird temperature sensor, a return pump, a fan, and a floor leak sensor all reporting through one interface.
It can run as a dedicated system on compatible hardware, on a Raspberry Pi or repurposed computer, inside a virtual machine, or as a container on a NAS or unRAID server. A dedicated Home Assistant Operating System installation reduces some administration, while container and virtual-machine installs fit people who already maintain servers at home.
Home Assistant is powerful because it is a real system, not a disposable gadget app. That also means it has a learning curve. You own a small always-on server, its updates, and its device setup. If that sounds interesting, this bridge is built for you. If it sounds like another job, Reef Trak still works without Home Assistant and nothing in the normal tank workflow depends on it.
What the bridge and Node One do together
The integration listens for state changes from the tank devices you selected. It batches those changes and sends them to Reef Trak over an outbound HTTPS connection. A heartbeat reports that the bridge is healthy, and a periodic full snapshot corrects any drift after a restart or temporary outage.
Node One uses the local Home Assistant connection for compatible switch entities. From the appliance or its local browser, the reef keeper can send an explicit on or off command and see the reported result. Power telemetry provides additional confirmation when the device exposes it.
That focused design matters around life-support equipment. Node One never retries a failed command automatically, and it does not turn a generic entity into dosing or heater automation. Independent equipment safeguards and a manual recovery path still matter.
Exactly what leaves your house
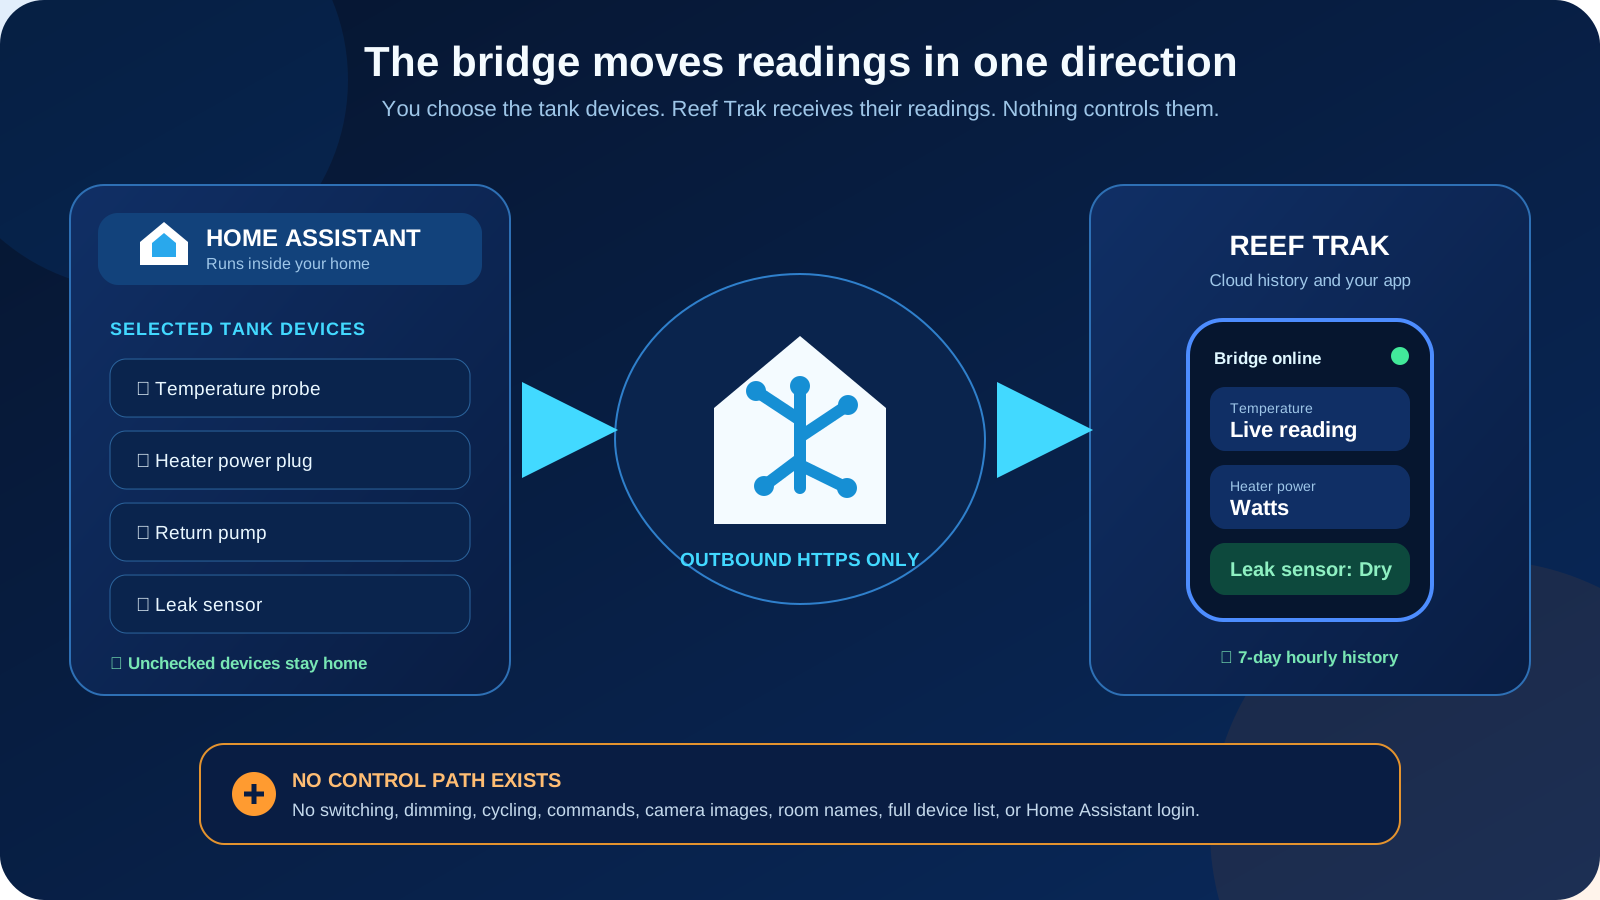
Privacy is enforced by the design of the integration. During setup, Home Assistant shows you the available devices and you select the ones that belong to the tank. Only those selected devices are uploaded. Reef Trak never receives the complete Home Assistant device list.
For a selected device, the bridge sends its display name, state or numeric value, unit, availability, timestamps, and a small allowlist of details needed to make the card useful. Examples include brightness, fan speed percentage or RPM, heater action, current temperature, and target temperature. Unknown fields are removed instead of being passed through.
The bridge sends the minimum information needed for tank monitoring.
| Sent for selected tank devices | Never sent |
|---|---|
| Device name and current reading | Your Home Assistant username or password |
| State, numeric value, and unit | The full Home Assistant device or entity list |
| Availability and timestamps | Unchecked devices or other people’s devices |
| Allowed display details such as fan speed or target temperature | Camera images, room names, GPS, or location |
Everything travels from Home Assistant to Reef Trak over HTTPS. The integration does not open a listening port, create a tunnel, or expose the Home Assistant server to the internet. Pairing uses a Reef Trak code, not the Home Assistant login.
Before you install
- Home Assistant 2025.6 or newer, running on any supported platform
- The Reef Trak app on iPhone or Android, signed in to your account
- Reef Trak Premium on the account that owns the tank
- At least one tank device already working in Home Assistant
- Terminal access for the one-command installer, or file access for the manual zip method
Before anything else, find out which kind of Home Assistant you have, because the next step differs. Open Settings > About and read the Installation method line. It says either Home Assistant Operating System (or Supervised) or Home Assistant Container. Both are fully supported; they just open a terminal differently.
Home Assistant Operating System: first click your username at the very bottom of the left sidebar and switch on Advanced Mode. Home Assistant hides the terminal until you do. Then open Settings > Apps (older screens say Add-ons), press Store, and install Terminal & SSH. It appears in your sidebar as Terminal.
Home Assistant Container (common on TrueNAS, unRAID, Synology, and plain Docker): there is no app store, and that is normal, not a problem. Open a shell on the container from the machine that runs it. On TrueNAS: Apps, open the Home Assistant app, and on the home-assistant container row click the small >_ shell icon. On unRAID: Docker tab, click the container, choose Console. On Synology: Container Manager, open the container, Terminal. Plain Docker: docker exec -it homeassistant bash.
One more tip from real installs: if Home Assistant's page refuses to load in your usual browser, try another browser or the server's IP address. One browser can fail where another loads the same address fine.
You do not need special aquarium hardware. Start with equipment that is already useful in Home Assistant. A power-monitoring plug under a heater can reveal whether the heater is actually drawing power. A temperature probe adds an independent reading. A leak sensor beside the sump watches a failure mode that aquarium controllers often miss.
Install the integration step by step
The installer places the Reef Trak integration in Home Assistant’s configuration directory. It does not pair an account or select devices. Those choices happen after the restart.
- Open a terminal. Use the path for your install type from the section above: the Terminal sidebar app on Home Assistant Operating System, or a shell on the container for TrueNAS, unRAID, Synology, and Docker installs. Existing SSH access works too.
- Run the installer.
The script finds the Home Assistant configuration folder and installscurl -sSL https://reeftrak.com/homeassistant/install | shcustom_components/reeftrak. - Restart Home Assistant. Go to Settings > System > Restart. A reload is not enough after installing a new custom integration.
- Create a pairing code in Reef Trak. Open the tank, tap the house icon in the header, and choose Pair through Reef Trak cloud. Reef Trak displays a six-character code. It expires after 10 minutes, and you can make another code at any time.
- Add Reef Trak in Home Assistant. Go to Settings > Devices & Services > Add Integration, search for Reef Trak, and enter the code.
- Select only tank equipment. The picker is the privacy boundary and it is two quick screens. First, a checkbox list of your devices: tick the ones that belong to this tank, leave everything else unchecked, and press Submit. Second, the readings under those devices, which arrive already selected: press Submit again. If you clear everything by accident, it refuses with a clear message instead of silently sending nothing.
- Return to the Reef Trak tank. The bridge status and selected devices should appear within seconds. History cards begin empty and fill as real readings arrive.
Pairing, credentials, and revocation
The six-character code is a short-lived invitation for one tank. Home Assistant exchanges it at reeftrak.com for credentials that belong only to that bridge installation and tank. Your Home Assistant login is never part of the exchange.
The bridge uses short-lived tokens and rotates them automatically. The server stores cryptographic fingerprints instead of reusable token text. Reusing a stale token revokes the installation, which limits the usefulness of copied credentials.
You can disconnect from either side. Removing the integration in Home Assistant stops the source. In Reef Trak, open the Home Assistant module menu, choose Connected bridges, and revoke the installation. Revocation cuts the data flow immediately. You can pair again later without penalty.
Choosing devices without building a junk drawer
Home Assistant installations can contain hundreds of entities. Many are diagnostic, duplicated, unavailable, or unrelated to the aquarium. Do not select everything. The everyday Reef Trak dashboard is meant to answer what the tank is doing, not reproduce the Home Assistant administration screen.
Start with two or three devices that change a decision: temperature, heater power, return-pump state, or a floor leak sensor. Add lights, fans, and other equipment after the first set is readable. Device names are for people, not permanent identifiers, so choose the actual device in Home Assistant instead of relying on a familiar name alone.
- Temperature probe: confirms water temperature and builds a real trend
- Power-monitoring heater plug: shows whether the heater is drawing power
- Return-pump or circulation-pump state: makes an unexpected stop visible
- Leak sensor: stays quiet when dry and becomes prominent when wet
- Light, fan, or climate device: read-only state and useful operating details
You can change the selected devices later from the integration’s Configure action in Home Assistant. Newly checked devices begin sending after the updated selection is saved. Unchecked devices stop being included.
What you see in Reef Trak
Inside the tank’s Home Assistant module, a status card summarizes bridge health, the number of devices, the latest connection time, and any warnings. Equipment cards are grouped into useful categories instead of one enormous raw entity grid.
Animated icons move only when the underlying device state says the equipment is running. A temperature or power card can show a mini trend from real history. A leak sensor stays calm and readable when it reports Dry, then becomes an alert when it reports moisture.
Tap a meaningful numeric device for a larger reading, a 24-hour or 7-day chart, and low, high, and average values. Power devices can also show energy used today, energy used this week, and peak draw when those readings exist. The app does not manufacture missing values to make a card look complete.
How live data and history stay honest
State changes are batched and normally reach Reef Trak within about 1.5 to 2 seconds. A heartbeat arrives every minute, and the bridge sends a complete snapshot every 15 minutes. The snapshot allows the cloud view to converge on Home Assistant again after a restart, missed event, or temporary network problem.
Numeric readings are folded into hourly minimum, maximum, and average buckets. The beta keeps seven days of these buckets. A new chart begins with Collecting history because there is no past data to draw. The line grows only from readings the bridge actually received.
If Reef Trak has not heard from the bridge for more than five minutes, every affected reading changes to Last known and the app shows an amber Bridge offline for N min message. Old data never pretends to be live data. When Home Assistant returns, the bridge normally recovers on its own within about 90 seconds.
Beta limits you should know
- This is a real beta. Screens will improve, and data flow may pause while problems are fixed.
- Supported Home Assistant domains include sensors, binary sensors, switches, lights, fans, and climate devices; Node One control is limited to compatible switch entities.
- Cameras are deliberately excluded. The bridge does not send camera images.
- History is limited to seven days during the beta.
- The bridge does not write readings into Reef Trak’s normal parameter log yet.
- The bridge does not calculate a complete tank electricity cost yet.
- Node One provides explicit local switch control; Home Assistant remains responsible for owner-configured automations and alerts.
Beta means you should expect rough edges in the connected experience. Supported control stays deliberately narrow: explicit local on/off commands, reported-state confirmation, power feedback where available, and no automatic retry.
Updating and troubleshooting
During the beta, update by running the same install command again and restarting Home Assistant. The installer replaces the integration files. Your pairing and device selection survive the update.
Fast checks for the most common setup problems.
| Symptom | What to check |
|---|---|
| Reef Trak is missing from Add Integration | Confirm custom_components/reeftrak exists in the configuration directory, then restart Home Assistant completely. |
| The pairing code is rejected | Make a new code in the Reef Trak app. Codes expire after 10 minutes and are intended for one exchange. |
| No devices appear in Reef Trak | Open Configure for the integration in Home Assistant and confirm that at least one tank device is selected. |
| Cards say Last known | Check that Home Assistant is running and has internet access. Wait for the next heartbeat or full snapshot. |
| A device name or value is wrong | Check the source device and entity in Home Assistant first, then report the exact device type and expected value. |
| History is empty | Leave the bridge connected while real readings arrive. New charts do not backfill invented history. |
For beta help, email support@reeftrak.com. Include the Home Assistant version, Reef Trak integration version, affected device type, what the Home Assistant entity currently shows, and what the Reef Trak card shows. Do not send passwords, access tokens, pairing codes, camera images, or a full Home Assistant configuration export.
Starting from zero with Home Assistant
If you do not have Home Assistant yet, treat it as a small home-server project. You can dedicate compatible hardware to Home Assistant Operating System, build a system around a Raspberry Pi, repurpose a computer, or use an existing NAS, unRAID server, or virtual-machine host if you are already comfortable maintaining it. Each path still needs power, networking, updates, and backups.
Begin with a few aquarium devices, not twenty. A temperature sensor, a power-monitoring heater plug, and a leak sensor form a useful first set. Get them stable and clearly named in Home Assistant. Then install the Reef Trak bridge. The bridge setup takes minutes once Home Assistant and the equipment are already working.
Home Assistant remains the place where devices are discovered, configured, and automated. Reef Trak adds the tank-focused record, and Node One adds local control for supported switch entities beside the readings and equipment context.
What is planned next
The next direction is to let selected readings, such as temperature, flow into Reef Trak’s normal parameter history on a sensible cadence. Energy analytics are also planned so a reef keeper can understand what the tank costs to run and how equipment draw changes over time.
Reading Apex and HYDROS data through their Home Assistant integrations is being explored. That could bring controller tanks and commodity smart devices into one tank view without giving Reef Trak the controller vendor’s cloud login.
Those are plans, not promises or current beta features. Control is available now through Node One for supported local switch entities, with state confirmation, power feedback where available, no automatic retry, and high-risk functions kept out of the generic switch path.
The bottom line
The Reef Trak Home Assistant bridge is for reef keepers who want tank readings beside the rest of the aquarium record. It turns temperature probes, smart plugs, pumps, fans, lights, and leak sensors into one focused equipment view, with Node One local control for supported switches.
Its boundaries are as important as its features. You choose the devices. Only their allowed readings leave the home. Stale data labels itself. Empty history stays empty. Credentials can be revoked. Supported Node One commands remain local and require an explicit action.
Install the integration, pair one tank, select a small group of useful devices, and let real history build. On Node One, compatible switch entities also gain confirmed local on/off control without automatic retries.